Samsung's Lab.dev is another cloud based mobile application testing service. This article is a summary of my experience with it specific to Android. The site also supports Windows Mobile, Java and bada testing.
What's great about it:)
- It's free!
What's not so great about it:(
- Limited functionality (no automated testing)
- Limited devices (only Samsung devices)
- Each session on a device is valid for a max of 30min.
For those of you who would like to try it out here's how..
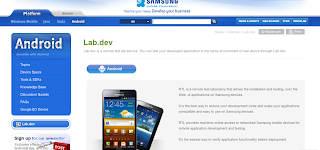
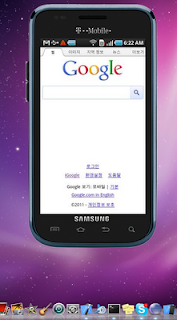
Go to https://innovator.samsungmobile.com/mbr/individual.mbr.add.do and register a new account. Sign in with the new account you created. Select Android page (see screen shot below..)
Now select Lab.dev from left of the screen (see pic below..)
Now click the Android button (see pic..)
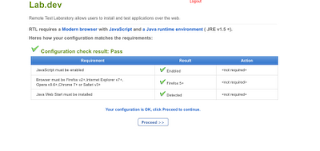
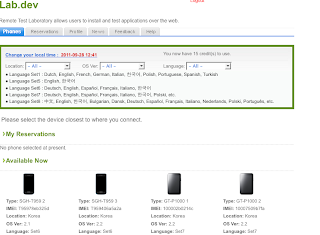
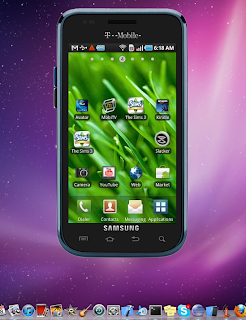
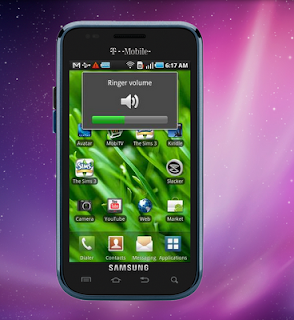
A requirements test will follow. If all requirements are met you can proceed to the lab screen where you can select the device you want from what is available (see screen..). One you've decided on a device select 'Start' to download the java web start app(.jnlp file) that will show you the running device (grant required permissions for the application to run on your pc).
You can test your android apps on the device by downloading the .apk files onto it over the internet.
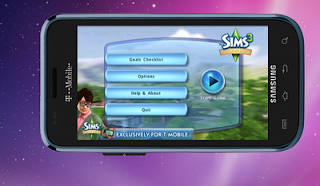
More screenshots...
Thursday, September 22, 2011
Tuesday, September 20, 2011
Perfecto! - Cloud mobile testing
Perfecto is the Spanish word for perfect. It is also the name of a cloud mobile testing service (http://www.perfectomobile.com). For an overview of how perfecto offers cloud mobile testing services please see their video(embeded below).
The perfecto website offers a 1 hour free trail for testing their service. This blogpost is an overview of my trial usage of perfecto.
Perfecto Free Trail Overview
For my trial experimenting I picked the Motorola Droid handset. We have one of these handsets at work. I picked this handset so I can rate my virtual testing experience against the real thing. Having completed my trial testing period I would say the virtual experience was quite realistic although it was a few seconds slower to touch and other event responses. Below are screenshots taken during the trail.
What I liked about perfecto:
- I could manipulate the virtual device much the same way as the real device. One functionality I couldn't trigger was the keypad open/close, but perhaps that functionality has been omitted from the trail version.
- Installing .apk files to the virtual device was a breeze.
- I could easily trigger incoming calls and sms on the virtual device(note: even though I refer to the perfecto device as 'virtual' it is in actuality a real device - refer video above). Triggering these actions on a real device would have been a little bit more cumbersome.
Perfecto does seem like a close to perfect solution for mobile testing on the cloud. However I was disappointed to find that the feature I was really looking forward to trying out; automation testing, was not available in the trial. If automated testing is as good as it appears in the video, then that would definitely make perfecto just perfect!:)
Monday, September 19, 2011
Android Application UI Testing (with monkey and monkeyrunner)
Android has some built in UI testing tools. These tools can be used for automated UI testing. However the tools are not so simple to use. This post is an attempt to set a guideline towards using these tools.
There are 2 main UI testing tools available
1.monkey (aka. UI/Application Exerciser Monkey)
This tool is a command line based tool that can be primarily used to stress test your application UI. It is the simplest tool to use. Here's how..
Running monkey as an application UI stress tester (runs a random set of commands on the application. useful to UI stress testing)
- Open a command console.
- First direct your console to the location of the adb (Android Debug Bridge) program in the android sdk. Typically you can use the following command for this..
$cd path_to_android_sdk/platform-tools/
path_to_android_sdk should be the path to the sdk on your pc
- Now make sure you device is connected with the application running on it or that the emulator is running the application.
- To test on device issue the following command in the console
$./adb -d shell monkey -p package_name -v 1000
(replace -d with -e to test on the emulator.
package_name is the name of the application package abnd it usually begins with com.
-v specifies the number of UI events to be generated, in this case we ask it to generate 1000 random events)
Now you will see the monkey stress testing your app.
If you get force close message while running monkey you have just discovered a bug that needs fixing. You can run
./adb logcat
in the console to generate the relevant logs.
Running specific commands in monkey
The monkey tool can also be used to run a specific set of commands on the application. However it is easier to use the monkeyrunner for this purpose.
On the connected device (to run on emulator simply replace -d with -e)
./adb -d shell monkey -p package_name --port 1080 &
./adb -d forward tcp:1080 tcp:1080
telnet localhost 1080
Now the following will be printed on cmd line..
Trying ::1...
Trying 127.0.0.1...
Connected to localhost.
Escape character is '^]'.
Now you can type in your instructions
>tap 150 200
you can write all instruction into a script (script.txt) as below..
# monkey
tap 100 180
type 123
tap 100 280
press DEL
press DEL
press DEL
press DEL
press DEL
press DEL
press DEL
press DEL
type -460.3
now run..
./adb -d shell monkey -p package_name --port 1080 &
./adb -d forward tcp:1080 tcp:1080
nc localhost 1080 < script.txt
2. monkeyrunner
The monkeyrunner tool is an API for writing automated UI tests. You can use it to write specific scripts that run a series of commands and inspects the output by taking screenshots etc. The android SDK includes two special scripts written using monkeyrunner which help in running automated UI tests. The scripts are..
monkey_recorder.py
monkey_playback.py
Copy these scripts to /tools folder in the android sdk. Set the console path to the tools directory. Open up the application on the emulator.
You can run the recorder as follows..
./monkeyrunner monkey_recorder.py
Below is a screenshot of monkey_recorder recording actions for calculator.
Use 'Export Actions' button to export the set of actions into a script (eg: calc.mr)
now run the cal.mr script on a connected device as follows.. (first make sure the emulator is shut down)
./monkeyrunner monkey_playback.py calc.mr
For playback to run properly you need to take precautions of setting the correct wait times and using the correct press, fling, type methods in the recorder.
Conclusion: Android has a good collection of tools meant to enable UI test automation. However they still have a lot more room for improvement especially in terms of ease of use and efficiency.
References:
http://developer.android.com/guide/developing/tools/monkey.html
http://developer.android.com/guide/developing/tools/monkeyrunner_concepts.html
Android Application Testing Guide - Diego Torres Milano
Subscribe to:
Posts (Atom)